 |
| Email Home Page |
|
| Email Home Page |
|
|
|
Part 2
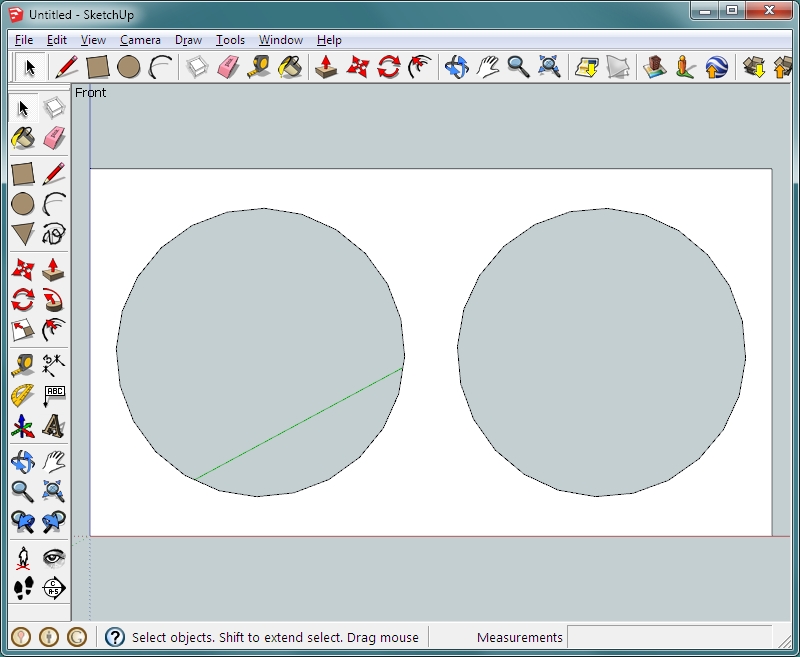
As an example, lets build a quick speaker enclosure. It will take you longer to read this section than it will take to draw an enclosure, after you've had a bit of practice. This enclosure will house two 12" woofers that will be mounted onto the front of the enclosure. To start, switch to the front camera view (CAMERA >> STANDARD VIEWS >> and select FRONT. Let's make the enclosure baffle (board where speakers are mounted) 26" x 14". Click on the intersection of the axes and release the mouse pulling a rectangle in the ratio of length and height that you want. Enter the values (noting which is longest and shortest based on the rectangle you pulled) separated by a comma and click enter. Zoom out so that there is plenty of space around the rectangle. Use the select tool to select the rectangle. Now select the 'move' tool. Hold the control button down and click and drag the (newly created) rectangle so that it's not touching the original rectangle. Using the select tool, double-click the newly created rectangle to highlight it. Now, right-click it and choose MAKE GROUP. Right-click it again and choose HIDE. It will no longer be visible. Click the 'zoom-extents' button to maximize the visible rectangle. The length of the front will be divided in half and each half will be divided again. This will give you the left/right center for each woofer. You will use guidelines to divide the front baffle. You want to make the guide lines vertical so you start from a vertical reference (side of the rectangle). Click on the line and move the cursor to the right. To find the center, move it along the top line of the rectangle until you see a blue dot. That will be the center. Click there to place the guide line. Do the same but start from the top-left corner and go to the point where the center guide line intersects the bottom edge of the rectangle. Do the same from the bottom-left corner to the top guide/edge intersection. It should look something like what you see below.
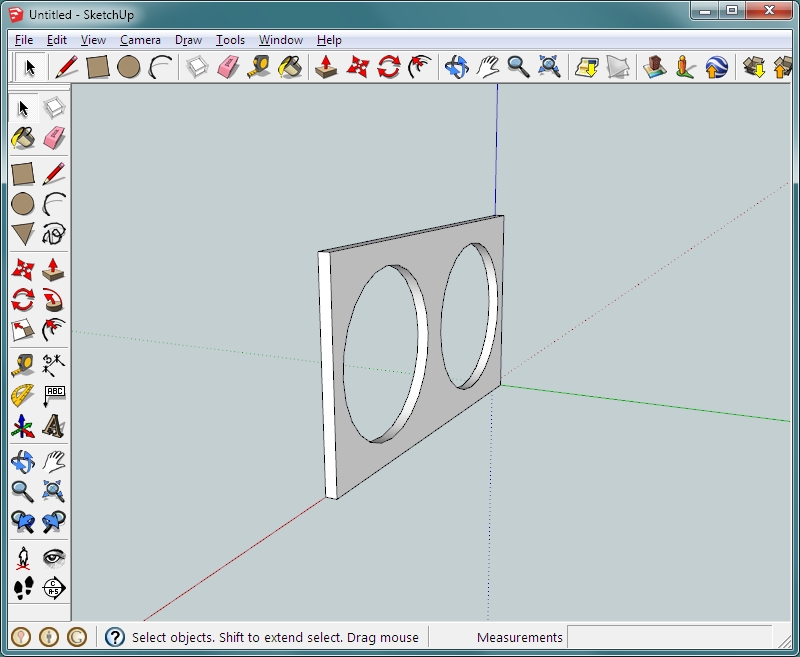
 Now we will use the circle tool. For a 12" woofer, you will need a hole approximately 11" in diameter. Sketchup works with the radius of a circle, not the diameter. The radius is 1/2 of the diameter. An 11 inch circle has a radius of 5.5". With the circle tool selected, click the intersection of the two guide lines and release the mouse button. Move the mouse out from that point a bit and enter 5.5 in the text field in the lower-left corner of the window. Hit enter. Now, using the select tool highlight the center of the circle and hit the delete button on your keyboard. Now, do the same thing on the other side of the baffle. When you drag the mouse out this time, it should try to stop at the same radius so you don't have to re-enter it manually. To get rid of the guide lines, go to EDIT >> DELETE GUIDES. You should now have precisely what you see below.
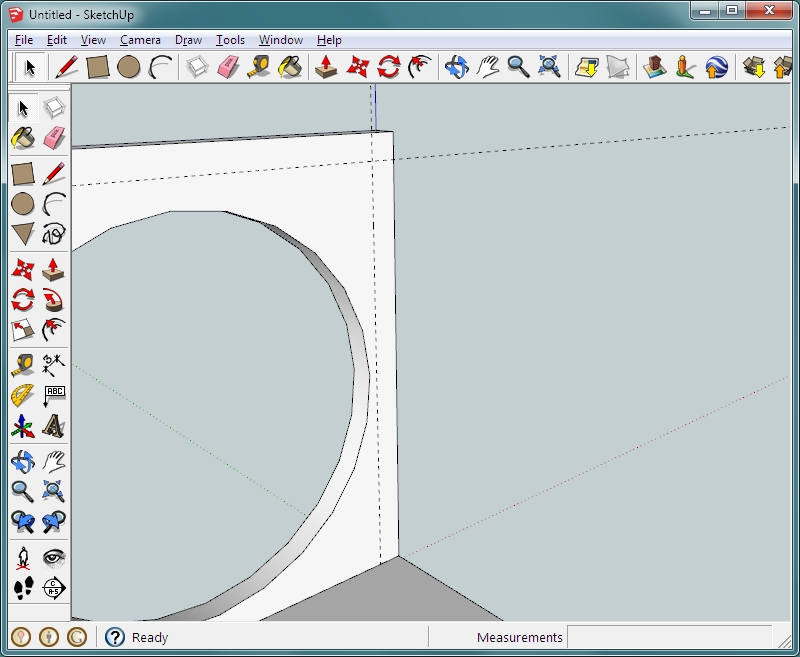
 If you look at the circles, you can see that they're not smooth. When you choose the circle tool, you will see a number in the text field. 24 is the default. That means that the circle will have 24 segments around its perimeter. If you want a smoother circle, type in a higher number. 360 is likely as high as you'll need to go.
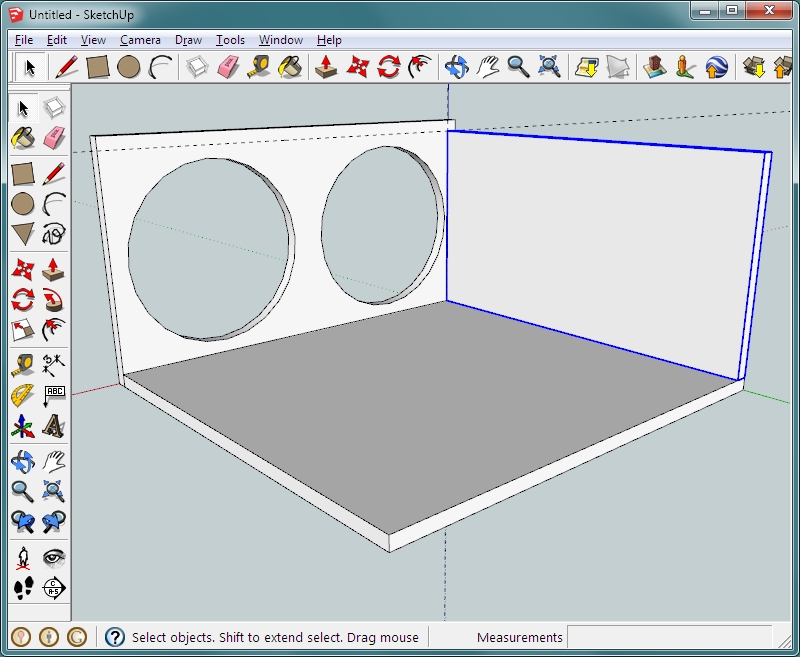
Note: Now to go to 3D mode. Go to CAMERA >> STANDARD VIEWS >> and select ISO. Zoom out a bit (mouse wheel) and select the orbit tool. Orbit around until you can see the back of the baffle board. It takes a bit of practice to get the hang of it so click and drag the image until you can see the back of the baffle. Select the PUSH/PULL tool. Click and release the back of the baffle. Enter 0.75 in the text field and hit enter. The baffle is now a 26" x 14" x 3/4" board. Use the select tool and drag a rectangle around the entire baffle to select it. Right-click and choose MAKE GROUP. You should have something like what you see in the image below.
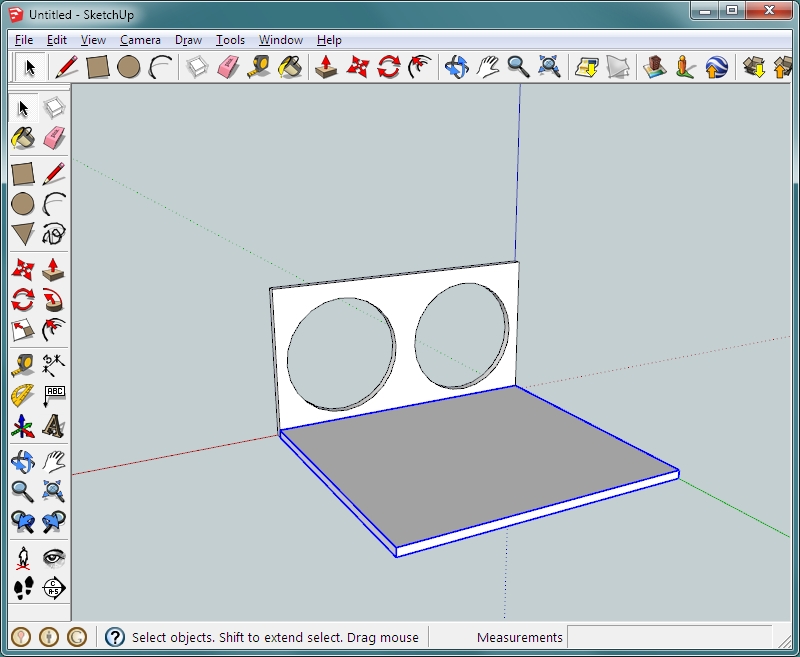
 There are several ways that you can assemble a speaker enclosure. On this one, the face will cover the entire front of the box. Let's make the bottom of this enclosure 24" deep by 26" wide. Select the RECTANGLE tool and start dragging a rectangle (click, release and move mouse) from the axis point towards the other end of the baffle. Make the rectangle long and narrow so you can easily see which dimensions will need to be the width and depth when you enter them. Enter the values, separated by a comma (26,24) and hit enter. The rectangle should be connected to the baffle and be as wide as the baffle. Use the PUSH/PULL tool to make the board 3/4" thick (click, release, type 0.75 and hit enter). Let's make this a component. With the select tool (arrow), triple-click the board to highlight all of it. Right-click and choose MAKE COMPONENT. You will be asked to name it. Let's name it 'top/bottom'. Enter the name and click CREATE. You should have something like you see in the image above.
 To make it easy to make the sides, create a guide 3/4" from the outer edge (tape measure tool with plus sign, click and release, enter 0.75 for the distance and hit enter). Create a second guide from the top of the enclosure. It should look something like this.
 Now select the RECTANGLE tool and make a rectangle from the top-right guide to the lower left corner where the guide meets the bottom board. Now use the PUSH/PULL tool to pull it out to 24" (click, move away from the baffle, release and enter 24 in the text field). Use the ZOOM EXTENTS button so that you can see the entire object. Triple-click the side to select all of it. Right-click it and select MAKE COMPONENT. Name it 'side' and click CREATE.
 To make the second side, you will simply copy the first side. Select the side. Choose the MOVE tool and hold down the control button. Click the side and move the copy up. Move the cursor over the bottom front of the side you just created and drag it to the point where the bottom and the left outer edge of the baffle meet. It should snap into place. If it doesn't want to snap into place, change the viewing angle slightly.
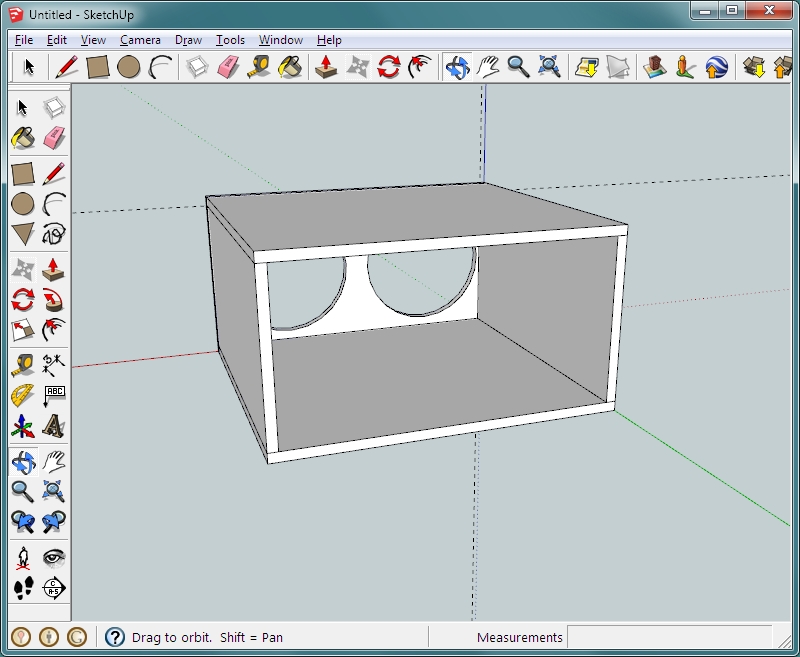
To make the back, we will use the hidden rectangle. Go to EDIT >> UN-HIDE >> select ALL. Use the ZOOM-EXTENTS button to see all components and orbit around so that you can see the back of the rectangle. The rectangle is grouped so you can't edit it without either un-grouping it or going into the group. To go into the group, use the select tool and double-click it. You will see a dashed box around the rectangle. This tells you that you're in the group. Use the PUSH/PULL tool and pull the back of the rectangle 0.75" (click, release, enter 0.75). Right-click and select CLOSE GROUP. Now orbit so that you can grab the right-front corner of the newly created board with the move tool. Move it to the back of the enclosure and let it snap in place. The 'style (WINDOW >> STYLES) was changed to x-ray below.
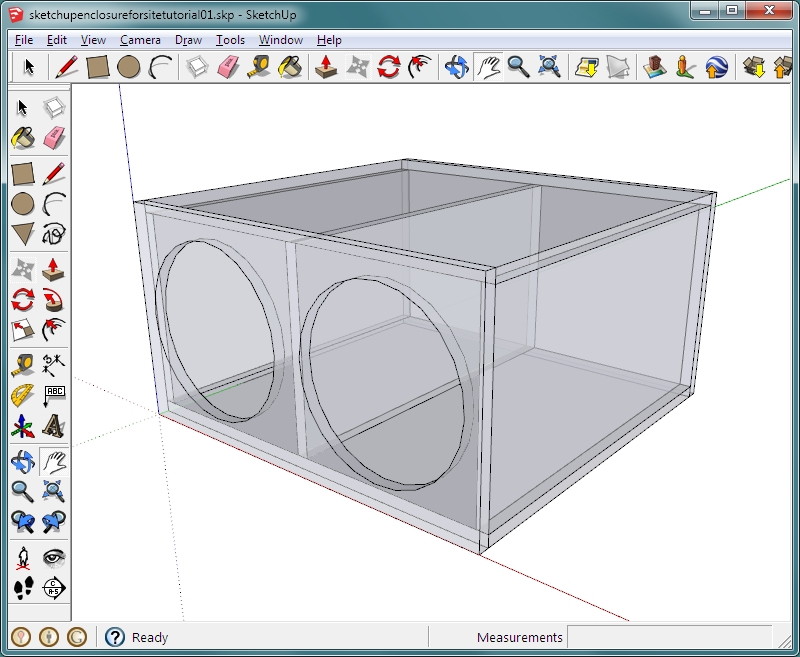
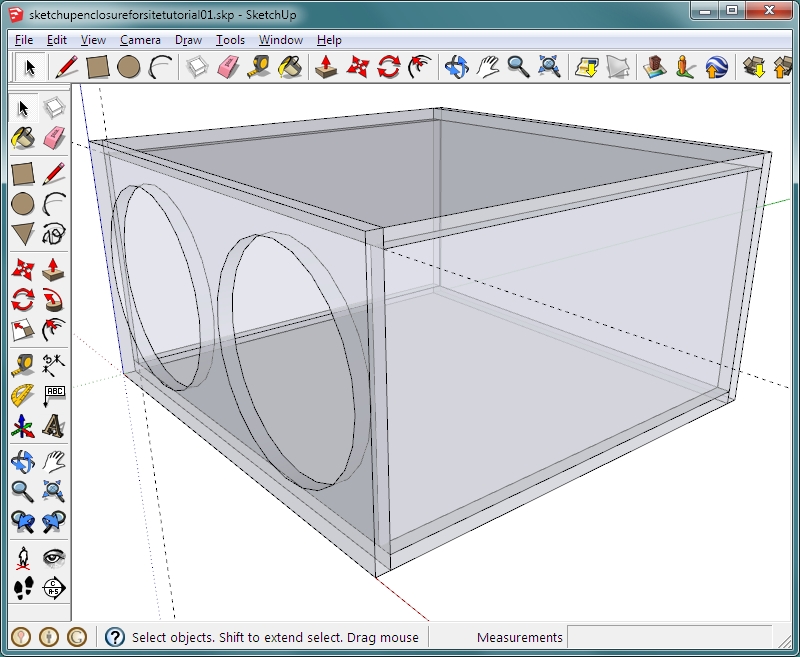 In the previous section, you could have done a few different things to make the back. It was done as it was to show a few more operations/functions. As long as the top, bottom and vertical boards were either components or grouped, it could also have been done with the rectangle tool. You would have started in one corner and dragged the rectangle to the opposite corner. Then the PUSH/PULL tool would have been used to pull it out 3/4 if an inch. After that, you would have triple-clicked it and made it a group or a component. Since only one back was going to be needed, there was no need to make it a component. If you wanted to add a divider, select and HIDE the top. Orbit so that you are looking at the back of the baffle. Create a center guide line (to position the divider). Select the right side board of the enclosure (right side looking at it from the back of the baffle), choose MOVE, hold the control button down and VERY slightly move the copy to the left. You don't want to move it up or back. Only move it slightly to the left. Now type 13 into the text field and hit enter. This will move the divider very close to where it needs to be. Move the cursor over the top front edge of the newly created divider and find the center of the top-front corner. Move that a bit to the left until it snaps to the guide.
 Above, depending on how far you were zoomed in or out, you could have moved the copy of the right to near the center guide line. Then zoomed in to find the center of the newly created divide to align it to the guide line. Previously, it was suggested that you should not allow the newly created divider to move up or back. This could have allowed it to get so fat out of line that it would have been difficult to position it on the guide line. When moving something along a straight line from where it was originally, use the arrow keys. The up arrow will lock it so that it only move parallel to the blue axis. The right arrow key locks it parallel to the red axis. The left arrow locks it to the green axis. If you start moving it and get it off of its intended axis, pressing any of these keys will move it back onto the corresponding axis. To get the top back, go to EDIT >> UN-HIDE >> ALL. To remove the guide lines permanently, go to EDIT and select DELETE GUIDES. To simply hide the lines, go to VIEW and de-select GUIDES. Previously, it was stated that it would take longer to read this section than it would to build the enclosure, a 3-12 enclosure took about 10 minutes. THIS is the 2-12 enclosure. THIS is the 3-12 enclosure. Download and open them to get a feel for the software.
 To add dimensions, you use the dimension tool. Click on the start, on the end and move up until the dimension is displayed as you want it. THIS is the file with dimensions if you want to download it.

This is the end of part 2 of the Sketchup tutorial. Click HERE to go to part 3 (10c in the directory).
|
|
|
|
